Okay, I’ll be honest – the first time someone mentioned a Black Russian bagel to me, I immediately thought of the cocktail and wondered if someone had lost their mind. But then I bit into one at a little bakery in Northeast Portland, and honestly? My world changed. This isn’t just another bagel flavor trying to be trendy – it’s a legitimate game-changer that combines the deep, earthy richness of rye with dark molasses in a way that makes your morning routine feel like a sophisticated adventure.
I’ve been obsessing over perfecting my Black Russian bagel recipe ever since that first bite, and trust me, I’ve had my share of disasters along the way. There was the time I added too much molasses and ended up with what Jamie called “bagel-shaped hockey pucks,” and don’t even get me started on my attempt to add actual coffee (spoiler alert: terrible idea). But after months of tweaking and testing – and probably gaining five pounds in the process – I’ve finally nailed it.
What Makes a Black Russian Bagel So Special?
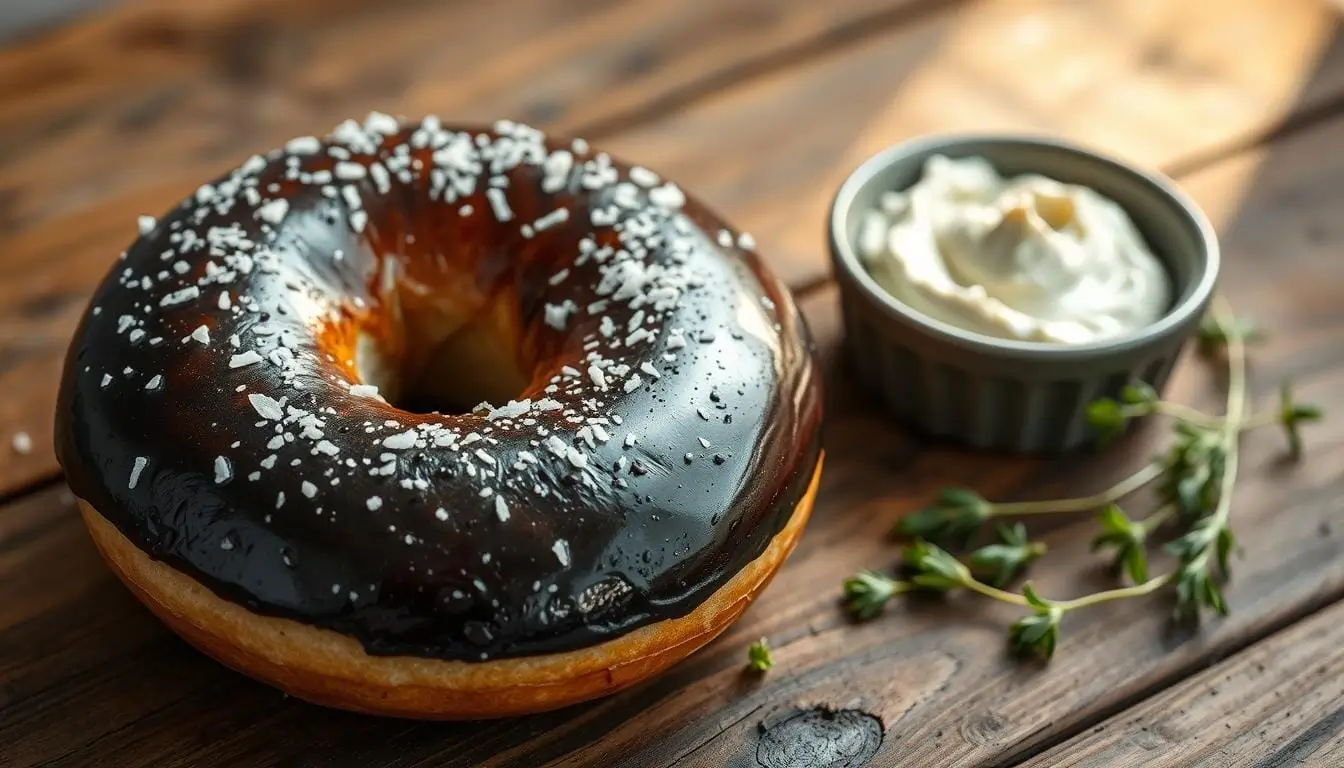
The beauty of a Black Russian bagel lies in its complexity. Unlike your standard everything or sesame bagel, this baby brings serious depth to the table. The dark rye flour gives it that distinctive earthy flavor, while the molasses adds a subtle sweetness that plays perfectly against the slight tang from the fermentation process. The result? A bagel that’s rich, slightly sweet, and incredibly satisfying without being overwhelming.
What I love most about this recipe is how it transforms your kitchen. When these are baking, your house smells like a cozy European bakery – all warm and inviting. Cilantro (my orange tabby) always camps out in the kitchen when I’m making these, probably hoping I’ll drop some dough. Smart cat.
The texture is where these bagels really shine. They’ve got that perfect chew that all good bagels should have, but with a slightly denser crumb thanks to the rye flour. It’s substantial enough to hold up to whatever you want to pile on top, but not so heavy that you feel like you need a nap after breakfast.

My Journey to the Perfect Black Russian Bagel
I’ll admit, I was intimidated by bagel-making at first. There’s something about the whole boiling-then-baking process that felt way more complicated than my usual 30-minute meal approach. But honestly, once you get the hang of it, it’s surprisingly forgiving. And the best part? Most of the work is just waiting around while the dough does its thing.
My first few attempts were… well, let’s call them “learning experiences.” I was so worried about overworking the dough that I barely mixed it, resulting in bagels that looked more like sad, flat rings than the plump beauties I was aiming for. Then I swung too far in the other direction and kneaded until my arms hurt, creating bagels tough enough to use as doorstops.
The breakthrough came when I realized that rye flour behaves differently than all-purpose flour. It doesn’t develop gluten the same way, so you can’t rely on the same visual cues. Instead of looking for that perfectly smooth, elastic dough, you’re aiming for something that feels substantial but not dense – kind of like a really good bread dough that knows it’s got character.
The Secret Ingredients That Make All the Difference
Dark Rye Flour: The Foundation
The star of this show is definitely the dark rye flour. I’ve tried making these with light rye, and while they’re still good, they lack that deep, complex flavor that makes Black Russian bagels so distinctive. The dark rye brings an almost chocolatey richness without any actual chocolate, which sounds weird but totally works.
If you can’t find dark rye flour at your regular grocery store, check out a health food store or order it online. Trust me, it’s worth the extra effort. I keep mine in the freezer to maintain freshness – learned that trick after finding some very unwelcome visitors in a bag I’d left in the pantry. Gross.
Molasses: The Sweet Surprise
The molasses is what gives these bagels their signature color and that subtle sweetness that makes them so addictive. I use blackstrap molasses because it has the most robust flavor, but regular dark molasses works fine too. Just don’t use light molasses – it won’t give you the depth you’re looking for.
Here’s something I learned the hard way: molasses can vary significantly in intensity between brands. Start with the amount in my recipe, but taste your dough (yes, raw dough – we’re rebels here) and adjust if needed. You want to taste the molasses but not have it overpower the rye.
The Complete Black Russian Bagel Recipe
Before we dive into the step-by-step process, let’s talk about what you’ll need. This recipe makes 8 generous bagels – perfect for a weekend batch that’ll last you through the week.
Ingredients You’ll Need
For the Bagels:
- 1 cup warm water (around 110°F – think baby bottle temperature)
- 2¼ teaspoons active dry yeast (that’s one standard packet)
- 3 tablespoons granulated sugar, divided
- 2 cups bread flour
- 1 cup dark rye flour (this is non-negotiable, trust me)
- 2 teaspoons salt
- 3 tablespoons blackstrap molasses
- 2 tablespoons vegetable oil
For the Boiling Bath:
- 8 cups water
- 1 tablespoon sugar
Optional Toppings:
- Sesame seeds
- Poppy seeds
- Coarse sea salt
- Everything bagel seasoning (because why not?)
Step-by-Step: Making Black Russian Bagels at Home
The Dough
Making bagel dough is actually pretty straightforward, even if you’ve never done it before. I like to think of it as slightly fussier bread dough – it wants attention, but it’s not going to punish you for small mistakes.
Start by dissolving your yeast in warm water with just a pinch of sugar. I know some people skip this step, but I like the insurance of knowing my yeast is active before I commit all my ingredients. While that’s proofing, mix your flours, salt, and the remaining sugar in a large bowl. The combination of bread flour and dark rye gives you the best of both worlds – structure and flavor.
Once your yeast is foamy and happy, stir in the molasses until it’s well combined. This is where things get a little messy, but embrace it. Pour the liquid into your flour mixture and stir until it comes together into a shaggy dough. Don’t worry if it looks rough – that’s exactly what you want at this stage.
The Knead
Here’s where my perfectionist tendencies used to get me in trouble. You want to knead this dough, but not into submission. Turn it out onto a lightly floured surface and knead for about 8-10 minutes. The dough should become smooth and elastic, but it won’t look like a white bread dough. The rye keeps it a bit more rustic, which is part of its charm.
I like to use the windowpane test – stretch a small piece of dough between your fingers. If you can stretch it thin enough to see light through it without it tearing, you’re good to go. If it tears easily, keep kneading for another few minutes.
The First Rise
Place your dough in an oiled bowl, cover with a damp towel, and let it rise in a warm spot for about an hour. I usually stick mine on top of the refrigerator – it’s consistently warm up there, and I can keep an eye on it while I clean up my flour explosion.
The dough won’t double in size like a regular white bread dough might. Rye is a bit more stubborn that way. You’re looking for it to increase by about 50%, and it should feel lighter and airier when you gently poke it.
Shaping: The Art of the Perfect Bagel Ring
This is honestly my favorite part of the whole process. There’s something deeply satisfying about turning that blob of dough into perfect little rings. I’ve tried both methods – poking a hole through the center and rolling into ropes then joining the ends – and I’m team rope-and-join all the way.
Divide your dough into 8 equal pieces (I use a kitchen scale for this because I’m slightly obsessive about uniform bagels). Roll each piece into a rope about 10 inches long, then overlap the ends by about an inch and roll that seam area to seal it. The hole should be about 2 inches across – bigger than you think it should be, because these babies will puff up during rising and boiling.
Place your shaped bagels on parchment-lined baking sheets, cover with damp towels, and let them rise for another 30 minutes. They won’t puff up dramatically, but they should look slightly fuller and feel lighter when you gently lift one.
The Boil: Where Magic Happens
This is the step that makes bagels, well, bagels. Bring a large pot of water to a rolling boil and add a tablespoon of sugar. Some recipes call for malt syrup, but honestly, sugar works just fine and you probably already have it in your pantry.
Working in batches of 3-4 bagels, carefully lower them into the boiling water. They should float pretty quickly – if they don’t, they might need a little more rising time. Boil for 60 seconds on each side, flipping them with a slotted spoon or spider.
Here’s something I learned after making wonky-shaped bagels for months: don’t overcrowd the pot. The bagels need room to float and bob around without bumping into each other. Patience, grasshopper.
The Bake: Bringing It All Together
Preheat your oven to 425°F while you’re boiling. Once all your bagels are boiled, place them back on the parchment-lined baking sheets. Now’s the time for any toppings if you’re using them – sesame seeds, poppy seeds, or just a sprinkle of coarse salt all work beautifully with the Black Russian flavor profile.
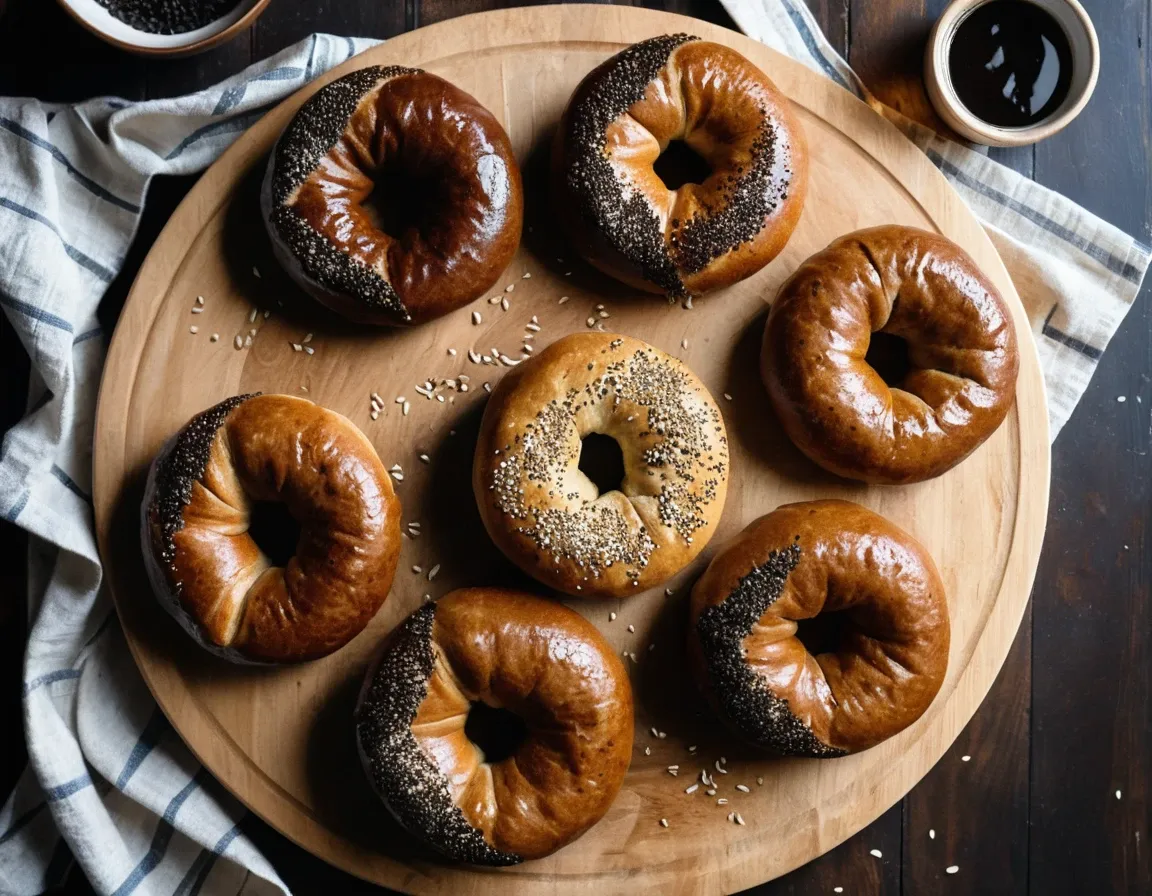
Bake for 20-25 minutes, rotating the pans halfway through for even browning. You’re looking for a deep, rich brown color – darker than regular bagels because of the molasses, but not burnt. They should sound hollow when tapped on the bottom.
Serving Suggestions That’ll Blow Your Mind
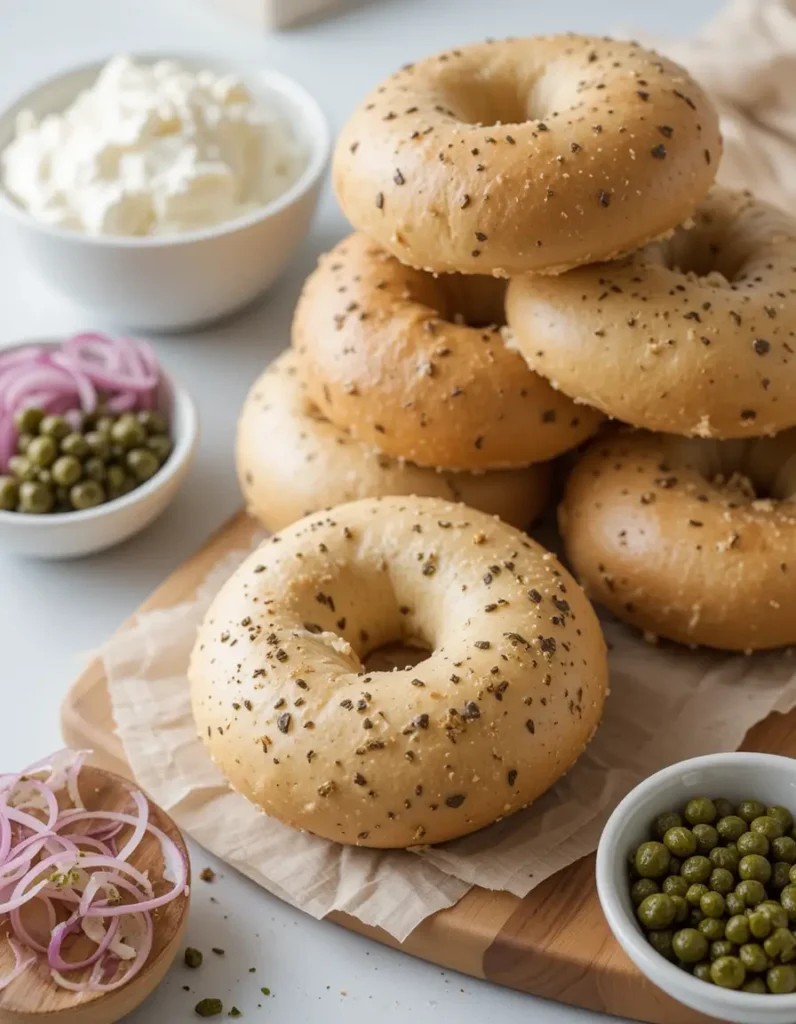
This is where things get fun. Black Russian bagels are incredibly versatile, but they definitely have some flavor combinations that just work better than others. My go-to is cream cheese with thinly sliced red onion and capers – the creamy, salty, briny combo is absolutely perfect against the rich, slightly sweet bagel. If you’re into salmon and want to really go all out, these make an incredible base for smoked salmon – the flavors are honestly made for each other.
But honestly, these bagels can handle bold flavors. I’ve done everything from smoked salmon and dill to sharp cheddar and sliced apple. Jamie’s favorite is peanut butter and sliced banana, which sounds weird but is surprisingly amazing. The nutty richness of the peanut butter plays beautifully with the molasses sweetness.
For something more substantial, try them as the base for a breakfast sandwich. The dense texture holds up perfectly to eggs, cheese, and whatever breakfast meat you prefer. Speaking of breakfast ideas, if you’re looking for more breakfast inspiration to go with these bagels, we’ve got tons of options that pair beautifully with this rich, complex flavor. I’ve even used them for savory lunch sandwiches – they’re particularly good with roasted vegetables and hummus.

Storage and Reheating Tips
Fresh bagels are obviously best, but let’s be real – most of us aren’t making bagels every day. These keep well for about 3 days at room temperature in a sealed container. After that, I recommend slicing and freezing them. They toast beautifully straight from frozen, and you’ll have fresh-tasting bagels whenever the craving hits.
Pro tip: if your day-old bagels are feeling a bit stale, wrap them in a damp paper towel and microwave for about 15 seconds before toasting. It helps restore some moisture and makes them taste fresher.
Why This Recipe Works for Busy Mornings
I know what you’re thinking – bagels from scratch seem like way too much work for a regular Tuesday. And you’re right, if you’re trying to do it all in one morning. But here’s the thing: most of the time is just waiting around while the dough does its thing. If you’re really pressed for time and looking for quick breakfast solutions, check out some of our 30-minute meals that can get you fed fast. But honestly, once you plan ahead with these bagels, the morning routine becomes totally manageable.
I usually start the dough the night before and let it do its first rise in the refrigerator overnight. In the morning, I just shape, do the quick second rise, and then boil and bake. The whole active morning process takes maybe 30 minutes, and most of that is hands-off time while they’re in the oven. It’s actually perfect meal prep for the week – make them Sunday and have amazing breakfasts sorted. For more meal prep ideas that save you time during busy mornings, our dump-and-go slow cooker recipes are absolute lifesavers.
Plus, there’s something really satisfying about eating a bagel you made yourself. It feels like a small victory before you even start your day, you know?
The Bottom Line
Black Russian bagels might not be as common as everything bagels or plain bagels, but they deserve a spot in your regular rotation. They’re sophisticated without being pretentious, flavorful without being overwhelming, and impressive without being impossible to make at home.
I’ve converted so many people with these bagels – even my neighbor who claimed to hate rye bread asked for the recipe after trying one. They’re conversation starters, mood lifters, and honestly, just really good food. And in my book, that’s exactly what cooking should be about.
Black Russian Bagel Recipe
Ingredients
Method
- In a small bowl, dissolve yeast and 1 tablespoon sugar in warm water. Let sit 5-10 minutes until foamy.
- In a large mixing bowl, whisk together bread flour, rye flour, salt, and remaining 2 tablespoons sugar.
- Stir molasses and oil into the yeast mixture until well combined.
- Pour wet ingredients into flour mixture and stir until a shaggy dough forms.
- Turn dough onto lightly floured surface and knead 8-10 minutes until smooth and elastic. Dough will be slightly dense due to rye flour.
- Place dough in oiled bowl, cover with damp towel, and let rise in warm place for 1 hour until increased by 50%.
- Divide dough into 8 equal pieces (about 4 oz each).
- Roll each piece into a 10-inch rope. Overlap ends by 1 inch and roll seam to seal, creating a 2-inch hole in center.
- Place shaped bagels on parchment-lined baking sheets. Cover and let rise 30 minutes.
- Preheat oven to 425°F. Bring 8 cups water and 1 tablespoon sugar to rolling boil in large pot.
- Working in batches of 3-4, gently lower bagels into boiling water. Boil 60 seconds on each side.
- Remove with slotted spoon and return to parchment-lined baking sheets.
- Sprinkle with desired toppings if using.
- Bake 20-25 minutes until deep brown and hollow-sounding when tapped.
- Cool on wire rack before slicing.
Notes
– Don’t skip the boiling step – this is what gives bagels their characteristic chewy texture.
– Bagel holes should be large (2 inches) as they’ll shrink during rising and boiling.
– Store at room temperature up to 3 days or slice and freeze up to 3 months.
– Make-ahead tip: After shaping, refrigerate overnight and continue with boiling step in morning. Nutrition Information (Per Bagel)
– Calories: 285
– Carbohydrates: 57g
– Protein: 9g
– Fat: 4g
– Fiber: 3g
– Sugar: 8g
– Sodium: 585mg Recipe Tips
– Test water temperature with thermometer – too hot will kill yeast
– Dough should feel slightly sticky but manageable when kneading
– Don’t overcrowd pot when boiling – bagels need room to float
– For extra shine, brush with beaten egg before baking
Black Russian Bagel FAQs
Why is my dough significantly darker or lighter than expected?
The color variation is mostly determined by your molasses brand and type. Blackstrap molasses provides the darkest color, while regular molasses yields a lighter shade. If your bagels aren’t dark enough, you can add 1-2 teaspoons of cocoa powder to the dry ingredients in your next batch.
Can I make these bagels with a stand mixer?
Absolutely! Use the dough hook attachment and mix on medium-low speed for about 7 minutes. The dough should clear the sides of the bowl but still stick slightly to the bottom—add flour or water a teaspoon at a time to achieve this consistency.
My bagels deflated when I put them in the boiling water. What happened?
This typically indicates over-proofing during the second rise. Next time, reduce the final proofing time by 5-10 minutes. The bagels should be slightly puffy but not fully doubled before boiling.
Can I prepare these the night before and bake in the morning?
Absolutely. Once your bagels are shaped, dust a baking sheet with cornmeal, arrange the bagels, cover tightly with plastic wrap, and refrigerate for 8–12 hours. The next morning, let them rest at room temperature for about 20 minutes before boiling and baking as usual.
How can I achieve the shiniest possible crust?
For maximum shine, add 1 tablespoon of honey along with the barley malt syrup to your boiling water, and make sure to use egg white (not whole egg) for brushing before baking.
You May Also Like