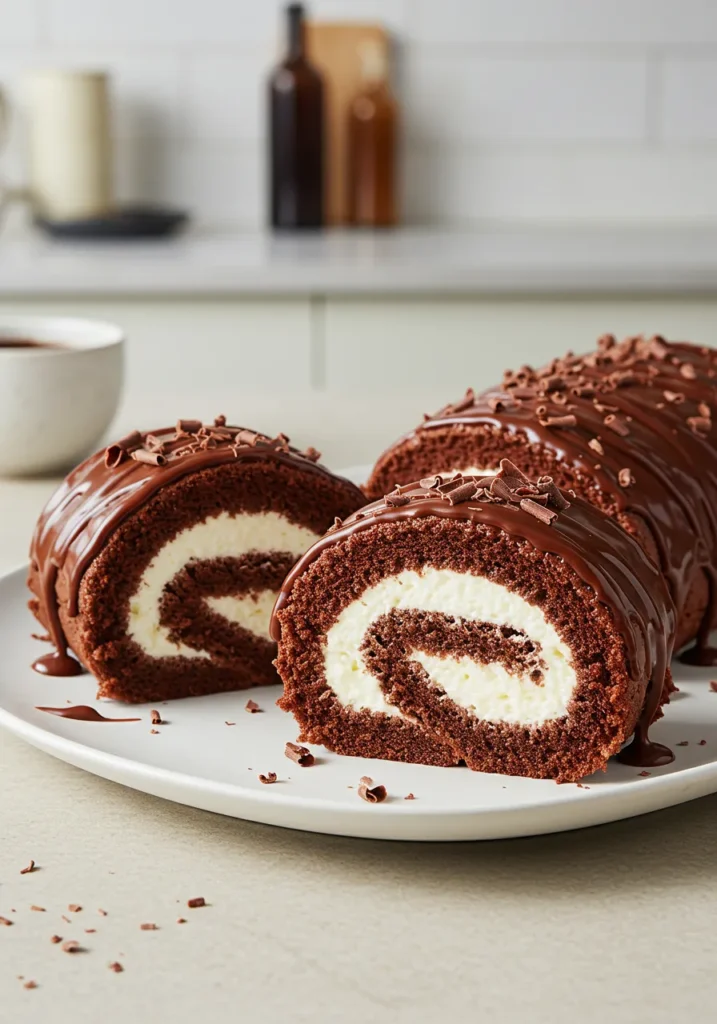
I still remember the first time I attempted a chocolate Swiss roll cake – it was supposed to be Jamie’s birthday surprise, and let me just say, it looked more like abstract art than dessert. The sponge cracked everywhere, the filling oozed out the sides, and honestly, I was ready to throw in the kitchen towel. But you know what? That disaster taught me everything I needed to know about creating the perfect chocolate Swiss roll cake.
After countless attempts (and probably way too many trips to the grocery store for more cocoa powder), I’ve finally cracked the code for this classic chocolate Swiss roll. And trust me on this one – once you master this technique, you’ll be rolling out picture-perfect Swiss rolls that’ll have everyone asking for your secret.
Why This Chocolate Swiss Roll Recipe Works Every Time
The thing about chocolate Swiss roll cakes is they’re actually much more forgiving than they look. I used to think you needed some kind of pastry chef magic to make a Swiss roll, but honestly, it’s all about understanding a few key principles. The sponge needs to be tender but sturdy, the rolling technique requires confidence (not perfection), and timing – well, timing is everything when making chocolate Swiss roll cake.
What makes this chocolate Swiss roll cake special is how we build flexibility right into the sponge. I learned this trick the hard way after my third cracked roll – adding just a touch of oil to the batter creates that silky texture that bends without breaking. If you’re looking for more dessert recipes that use similar techniques, I have plenty of options that’ll help you master these foundational skills.
The Secret to a Perfect Swiss Roll Sponge Every Single Time
Here’s where most people (including past me) go wrong with their chocolate Swiss roll cake: they overthink the mixing. Your chocolate sponge should be light and airy, yes, but it also needs structure. I whip my eggs until they’re pale and thick – we’re talking about tripling in volume here. When you lift the beaters, the mixture should fall in ribbons that hold their shape for a few seconds.
The cocoa powder integration is crucial too for a successful chocolate Swiss roll. I always sift it twice (yes, twice!) because lumpy chocolate sponge is nobody’s friend. And here’s my controversial opinion: I actually prefer Dutch-processed cocoa for this chocolate Swiss roll cake recipe because it gives you that deep, rich chocolate flavor without any bitterness.
Ingredients You’ll Need
For the Chocolate Sponge:
- 4 large eggs, room temperature
- ¾ cup granulated sugar
- ¾ cup all-purpose flour
- ¼ cup unsweetened cocoa powder (preferably Dutch-processed)
- 1 tablespoon melted butter
- Pinch of salt
- Powdered sugar for dusting
For the Whipped Cream Filling:
- 1 cup heavy whipping cream, cold
- 3 tablespoons powdered sugar
- 1 teaspoon vanilla extract
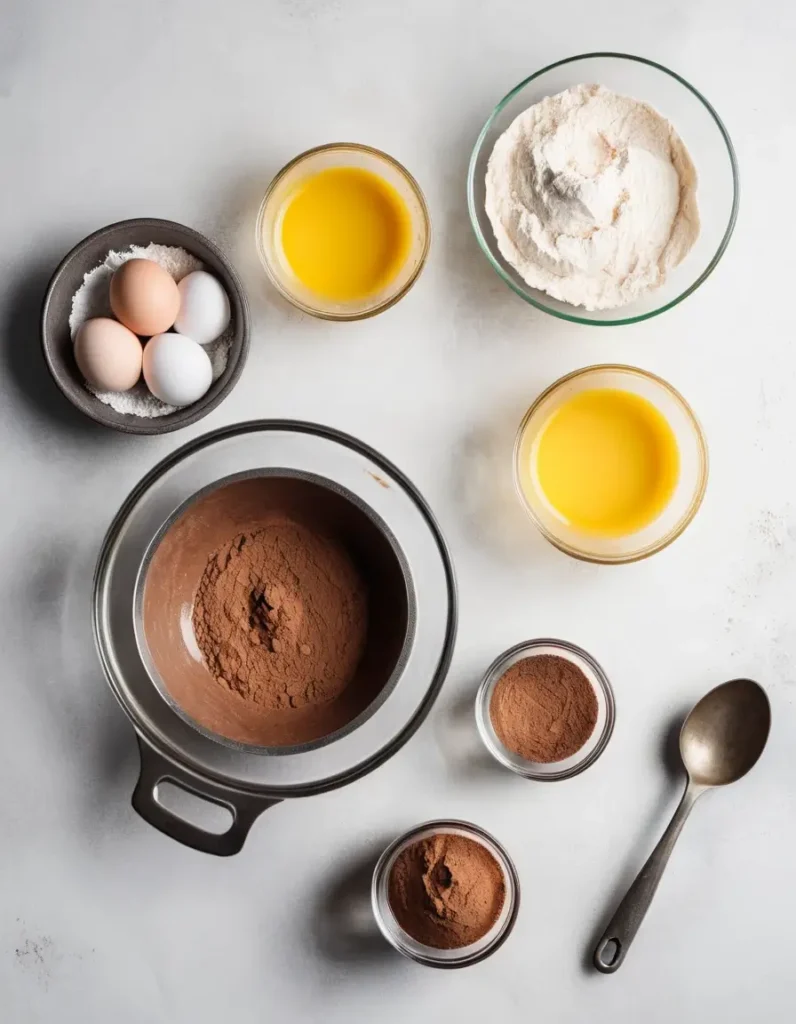
The beauty of this chocolate Swiss roll cake is how simple the ingredient list really is – you probably have most of these items in your pantry already. I always make sure my eggs are at room temperature because they whip up so much better that way.
My Foolproof 5-Step Method
Step 1: Prepare Your Pan Like a Pro
Line your 15×10 jelly roll pan with parchment paper, leaving about 2 inches hanging over each side. I learned this overhang trick from my neighbor who used to be a pastry chef – it makes lifting so much easier. Lightly grease the parchment because we’re not taking any chances with sticking.
Step 2: Create the Perfect Sponge
Beat 4 large eggs with ¾ cup granulated sugar for about 5 minutes until thick and pale. Seriously, don’t rush this part – your arm might get tired, but this is where the magic happens. Gently fold in ¾ cup flour, ¼ cup cocoa powder, and 1 tablespoon melted butter. The key word here is “gently” – we want to keep all that air we just whipped in.
Step 3: The Baking Sweet Spot
Bake at 375°F for exactly 12 minutes. Not 10, not 15 – 12 minutes. I’ve tested this more times than I care to admit, and this timing gives you a sponge that’s set but still tender enough to roll without cracking.
Step 4: The Rolling Technique That Changes Everything
Here’s where I see people panic, but don’t worry – I’ve got you covered. As soon as the cake comes out of the oven, immediately turn it onto a clean kitchen towel dusted with powdered sugar. Peel off the parchment paper (it should come off easily if you greased it), then roll the cake up in the towel starting from the short end. Let it cool completely rolled up – this “trains” the sponge to hold its shape.
Step 5: Fill and Final Roll
Unroll your cooled sponge (it might crack slightly at the edges, and that’s totally normal), spread your filling evenly, then re-roll without the towel. I like to wrap the finished roll in plastic wrap and chill it for at least an hour before slicing – it helps everything set perfectly.
Let’s Talk About That Filling
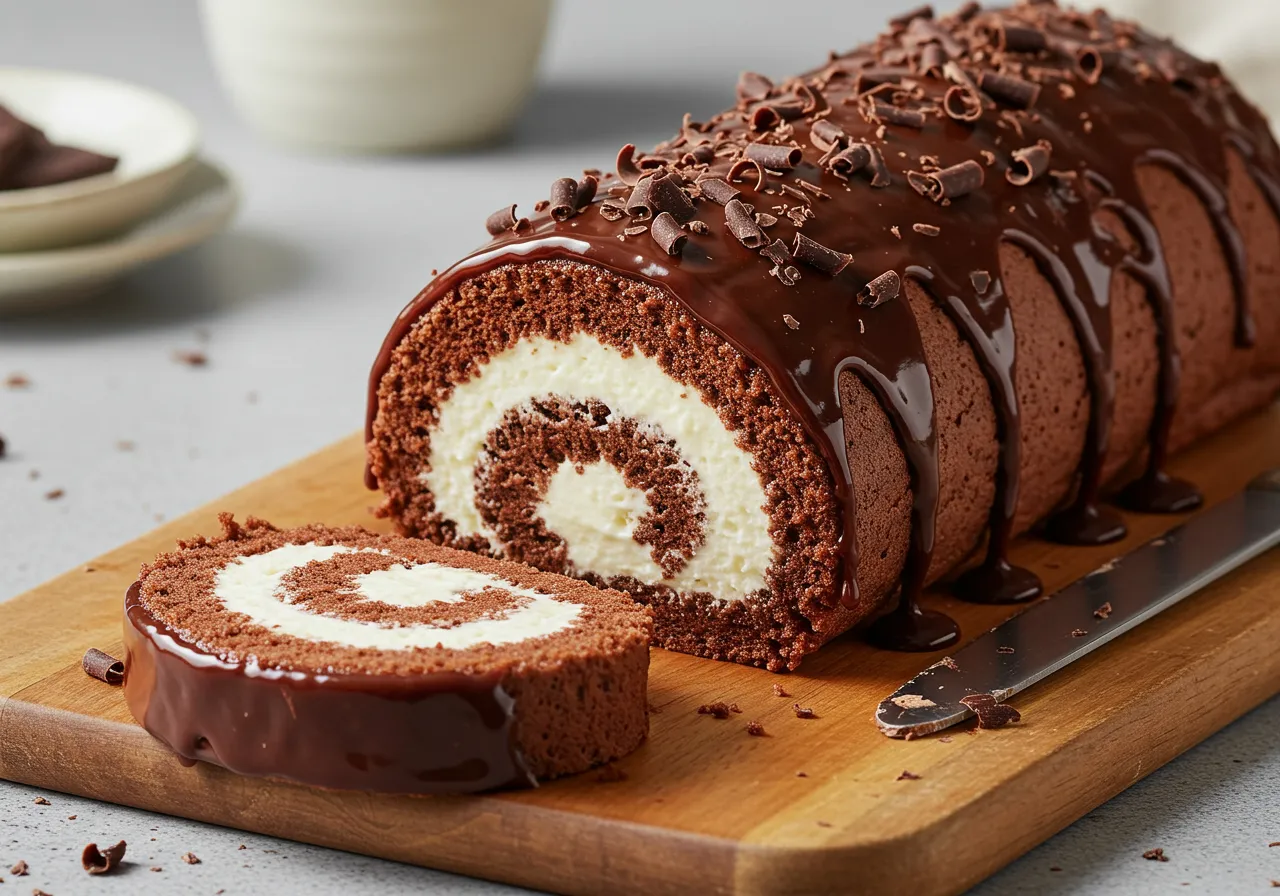
While the chocolate sponge is the star of any Swiss roll cake, the filling is what makes people come back for seconds. My go-to is a simple whipped cream with a touch of vanilla, but honestly, this chocolate Swiss roll cake is incredibly versatile. I’ve done everything from raspberry jam mixed with mascarpone to a decadent chocolate ganache for an extra indulgent chocolate Swiss roll.
For the whipped cream filling, I use 1 cup heavy cream, 3 tablespoons powdered sugar, and 1 teaspoon vanilla. Whip it to soft peaks – you want it spreadable but not so stiff that it tears your delicate sponge. This technique also works beautifully for my strawberry earthquake cake, where getting the right consistency is equally important.
Common Mistakes (That I’ve Definitely Made)
Don’t overmix your batter – those air bubbles are precious. Also, resist the urge to open the oven door during baking. I know it’s tempting, but temperature fluctuations can cause your sponge to fall or bake unevenly.
And here’s something nobody warns you about: don’t let the rolled cake sit too long before filling it. I once got distracted (thanks, Cilantro, for knocking over my flour canister), and by the time I got back to my Swiss roll, it had gotten too set to unroll smoothly.
Storage and Serving Tips
Your chocolate Swiss roll cake actually gets better after sitting in the fridge for a few hours – all the flavors meld together beautifully. I usually make mine the day before I need it. It’ll keep covered in the refrigerator for up to 3 days, though honestly, it rarely lasts that long in my house.
When you’re ready to serve, use a sharp serrated knife and wipe it clean between slices. Trust me, this makes all the difference for those Instagram-worthy cross-sections that show off your perfect spiral.
Make It Your Own
The beautiful thing about mastering this basic chocolate Swiss roll technique is how many directions you can take it. Sometimes I add a tablespoon of coffee to the batter for a subtle mocha flavor, or fold fresh berries into the whipped cream for a seasonal twist. You might also enjoy trying my peach cobbler with cake mix for another fruit-forward dessert that’s perfect for entertaining.
If you love experimenting with flavors like I do, you might want to try my red velvet cupcakes with cream cheese frosting – the same attention to texture and flavor balance makes them absolutely irresistible. It’s become one of my most requested desserts for spring gatherings!
The Sweet Success
There’s something incredibly satisfying about slicing into a perfect chocolate Swiss roll cake recipe and seeing that beautiful spiral. It feels fancy and impressive, but now you know the secret – it’s really just about understanding your ingredients and trusting the process.
Your kitchen will smell absolutely incredible while this is baking, and honestly, even if your first attempt isn’t picture-perfect, it’s still going to taste amazing. I always tell my readers that imperfection adds character – some of my most delicious Swiss rolls have been the slightly wonky ones.
So grab your apron, dust off that jelly roll pan, and give this chocolate Swiss roll cake a try. I have a feeling it’s going to become your new go-to impressive dessert that’s secretly much easier than it looks!
Perfect Chocolate Swiss Roll Cake – Easy 5-Step Guide
Ingredients
Method
- Prepare the pan: Preheat oven to 375°F (190°C). Line a 15×10-inch jelly roll pan with parchment paper, leaving 2 inches overhang on each side. Lightly grease the parchment paper.
- Make the chocolate sponge: In a large bowl, beat eggs and granulated sugar with electric mixer on high speed for 5 minutes until thick, pale, and tripled in volume. The mixture should fall in ribbons when beaters are lifted.
- Add dry ingredients: Sift together flour, cocoa powder, and salt. Gently fold dry ingredients and melted butter into egg mixture using a rubber spatula until just combined. Don’t overmix.
- Bake the cake: Spread batter evenly in prepared pan. Bake for exactly 12 minutes until cake springs back lightly when touched and pulls slightly from edges.
- Roll immediately: Turn hot cake onto a clean kitchen towel dusted generously with powdered sugar. Peel off parchment paper and roll cake in towel starting from short end. Cool completely rolled up, about 1 hour.
- Prepare filling: Beat heavy cream, powdered sugar, and vanilla with electric mixer until soft peaks form. Don’t overwhip.
- Assemble and chill: Carefully unroll cooled cake and spread filling evenly, leaving ½-inch border. Re-roll cake without towel. Wrap tightly in plastic wrap and refrigerate 1 hour before slicing.
Notes
- Room temperature eggs whip to greater volume and create a more tender sponge
- Don’t overbake – cake should be set but still tender to prevent cracking
- Rolling while warm trains the sponge to hold its curved shape
- Sharp serrated knife creates clean, professional-looking slices
- Sift cocoa twice for smoothest texture and no lumps
Recipe Tips & Variations
- Mocha Swiss Roll: Add 1 tablespoon instant coffee granules to batter
- Berry Filling: Mix ¼ cup raspberry jam into whipped cream
- Chocolate Ganache: Replace cream filling with cooled chocolate ganache
- Storage: Keeps covered in refrigerator up to 3 days
- Serving: Dust with cocoa powder or powdered sugar before serving
Nutrition Information (Per Slice)
- Calories: 185
- Total Carbohydrates: 22g
- Dietary Fiber: 1g
- Total Sugars: 18g
- Protein: 4g
- Total Fat: 9g
- Saturated Fat: 5g
- Cholesterol: 95mg
- Sodium: 45mg
FAQs
Q: Can I make this Swiss roll ahead of time? A: Absolutely! The completed Swiss roll improves in flavor when made 1-2 days ahead. Store wrapped in the refrigerator and slice just before serving for the best presentation.
Q: Why did my Swiss roll crack when rolling? A: Cracking typically occurs when the cake is overbaked or has cooled too much before rolling. Ensure you roll while the cake is still warm and bake only until the surface springs back lightly.
Q: Can I use different fillings besides whipped cream? A: Yes! Popular alternatives include chocolate ganache, cream cheese frosting, fruit preserves, or even ice cream for a frozen dessert version. Adjust quantities based on your chosen filling’s consistency.
Q: How do I know when the sponge is properly baked? A: The cake should spring back when lightly touched and appear set but not dry. It typically takes 10-12 minutes – overbaking is the most common cause of rolling problems.
Q: Can this recipe be made gluten-free? A: Yes, substitute the all-purpose flour with a 1:1 gluten-free baking flour blend. The texture may be slightly different but still delicious and rollable when handled properly.
You May Also Like