
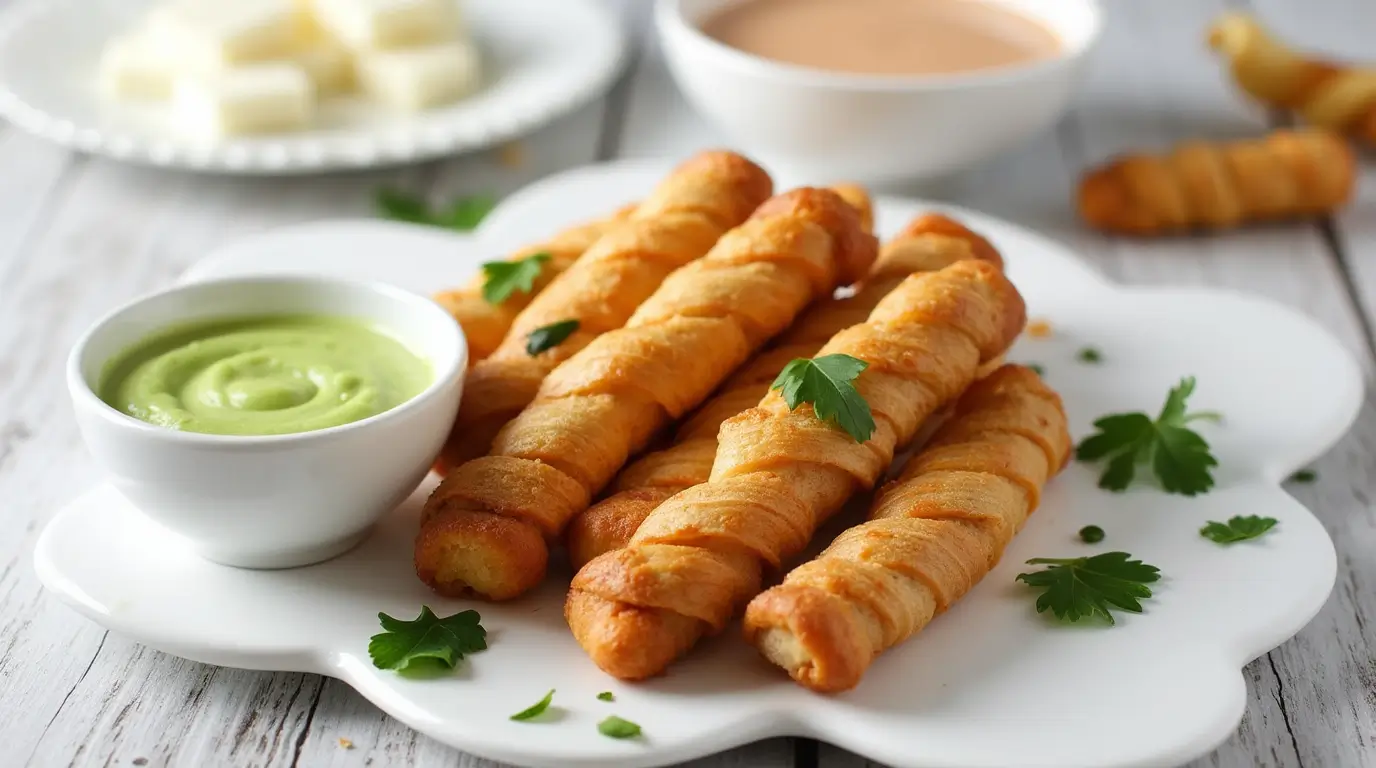
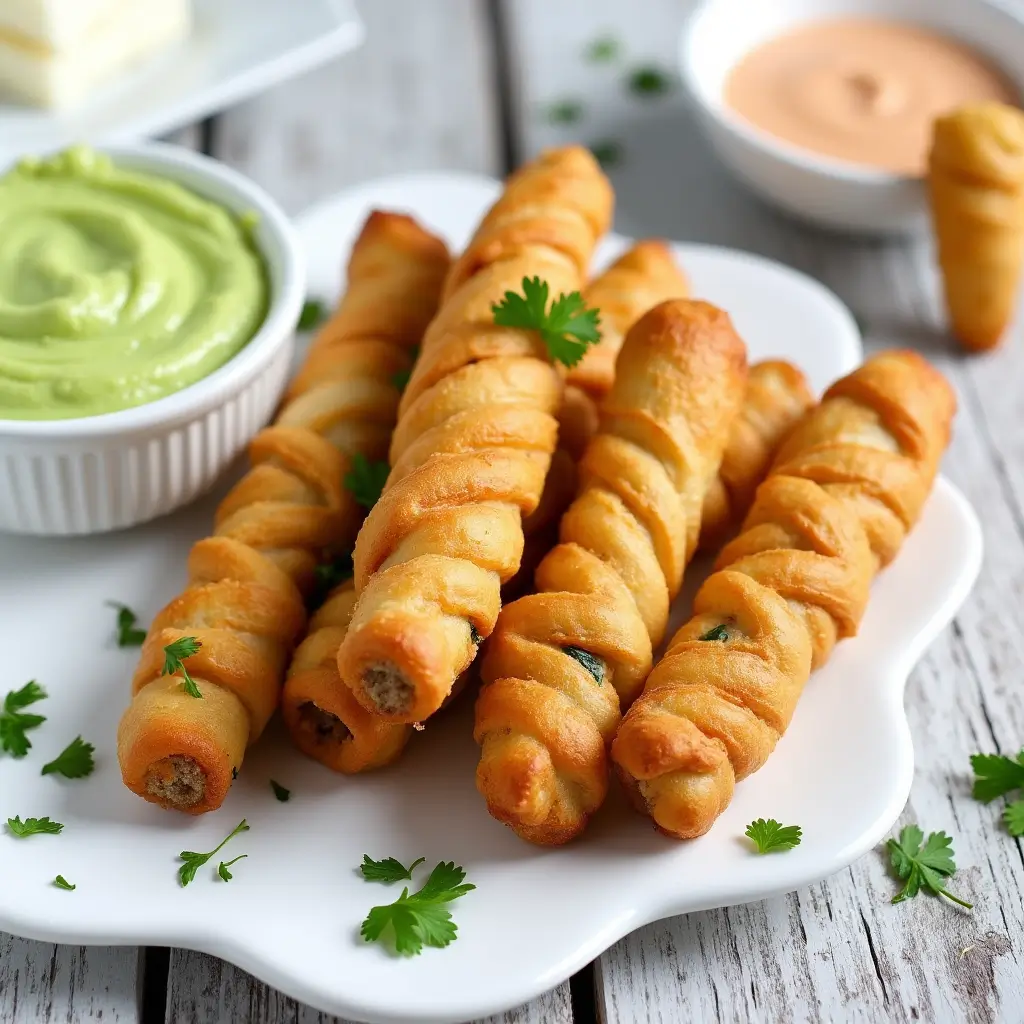
Craving a crispy snack on the outside, gooey on the inside, and downright irresistible? Say hello to Tequeños—the golden, cheesy bites that are a staple of Venezuelan cuisine. These delightful finger foods are perfect for parties, game nights, or even a cozy evening in. Imagine biting into a warm, flaky pastry wrapped around a stretchy, melty cheese center. Sounds dreamy, right?
Tequeños are more than just a snack; they celebrate flavor and texture. Whether you’re hosting a gathering or simply treating yourself, mastering this recipe will make you the star of any occasion. Plus, they’re surprisingly easy to make once you get the hang of it!
This guide’ll walk you through every step to create perfect golden Tequeños—crispy, cheesy, and utterly delicious. We’ve got you covered from choosing the right cheese to nailing the frying technique. Let’s dive in and turn your kitchen into a Venezuelan-inspired haven!
The Best Ways to Enjoy Tequeños
- Crowd-pleaser: Perfect for parties, potlucks, or family snacks.
- Versatile: Pair with your favorite dipping sauces for extra flair.
- Beginner-friendly: Simple steps with professional results.
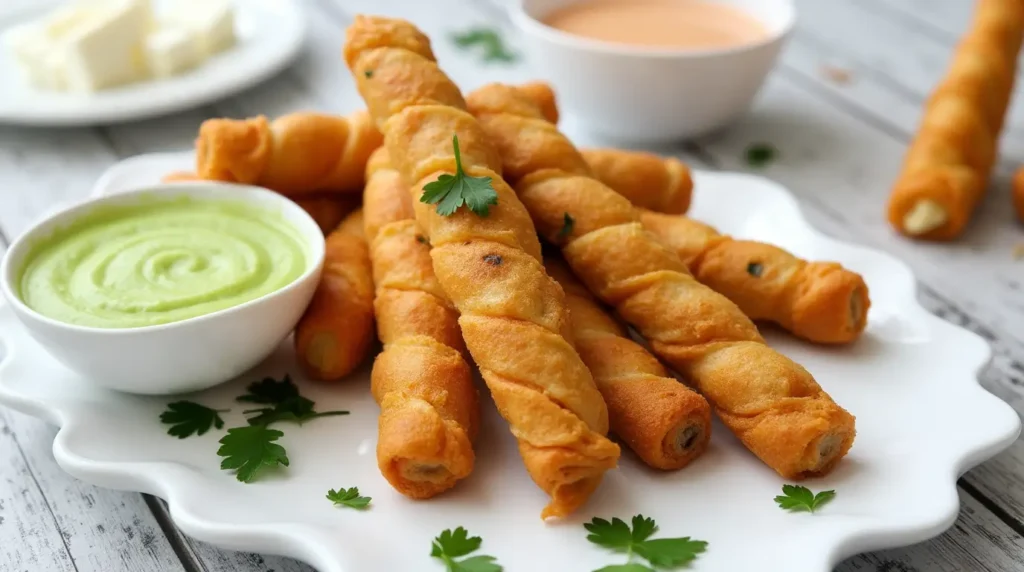
- Golden perfection: Crispy, flaky, and cheesy in every bite.
Key Tips Before You Start
- Use queso blanco or a similar melting cheese for the best texture.
- Keep your dough chilled to make rolling and shaping easier.
- Fry at the right temperature (around 350°F/175°C) to achieve that golden crunch without burning.
Ingredients
Before we dive into the fun part, let’s make sure you have everything you need to create these mouthwatering Tequeños Venezolanos. The ingredients are simple, but each plays a crucial role in achieving that perfect balance of crispy dough and melty cheese. Here’s what you’ll need:
For the Dough:
- 2 cups all-purpose flour (plus extra for dusting)
- 1/4 teaspoon salt
- 1/4 cup unsalted butter (cold and cubed)
- 1 large egg
- 1/4 cup cold water (adjust as needed)
For the Filling:
- 8 oz queso blanco or queso de freír (cut into 3-inch-long sticks)
- Alternative cheeses: Mozzarella or halloumi (if queso blanco is unavailable)
For Frying:
- 2 cups vegetable oil (for frying)
Instructions
Now that your ingredients are ready, let’s roll up our sleeves and make these irresistible Tequeños! Follow these step-by-step instructions, and you’ll have golden, cheesy bites in no time.
Step 1: Prepare the Dough
- In a large mixing bowl, combine the flour and salt.
- Add the cold, cubed butter and use your fingertips to rub it into the flour until the mixture resembles coarse crumbs.
- Crack in the egg and mix gently. Gradually add cold water, one tablespoon at a time, until the dough comes together. Be careful not to overwork it!
- Shape the dough into a ball, wrap it in plastic wrap, and refrigerate for at least 30 minutes. This helps the dough firm up and makes it easier to handle.

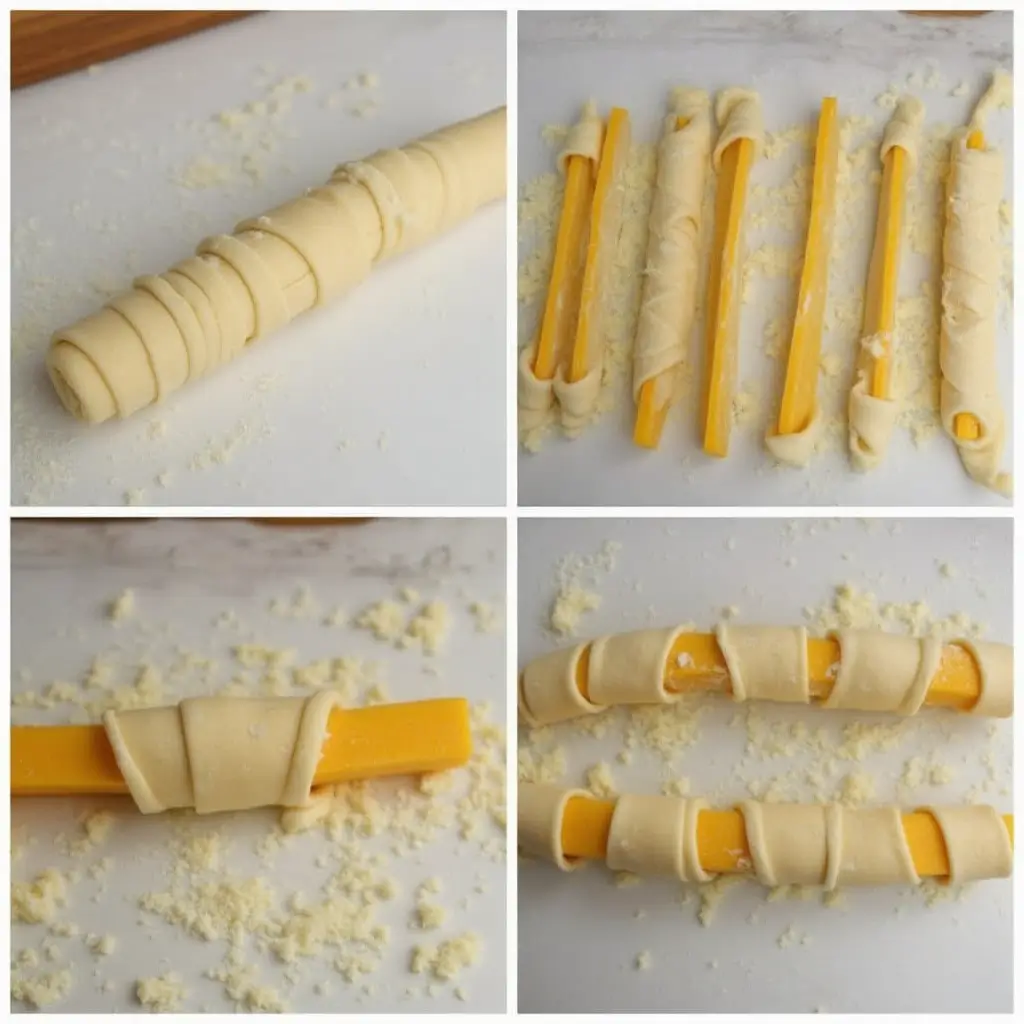
Step 2: Shape the Tequeños
- Once the dough is chilled, roll it out on a lightly floured surface to about 1/8-inch thickness.
- Cut the dough into strips approximately 1 inch wide and 6 inches long.
- Take a strip of dough and wrap it around a stick of cheese, starting at one end and spiraling slightly as you go. Make sure the cheese is fully covered, and pinch the ends to seal. Repeat with the remaining dough and cheese.
Step 3: Fry to Golden Perfection
- Heat the vegetable oil in a deep skillet or pot to 350°F (175°C). Use a thermometer to ensure the temperature is just right—this is key for achieving that golden, crispy exterior.
- Carefully place a few Tequeños into the hot oil, making sure not to overcrowd the pan. Fry for 2-3 minutes, turning occasionally, until they’re evenly golden brown.
- Remove with a slotted spoon and place them on a paper towel-lined plate to drain excess oil.
Pro Tips for Success
- Chill the dough: Cold dough is easier to handle and prevents the butter from melting too quickly.
- Seal tightly: Make sure the ends of the dough are well-sealed to prevent cheese from leaking during frying.
- Fry in batches: Overcrowding the pan can lower the oil temperature, resulting in soggy Tequeños.
With these steps, you’re well on your way to creating Tequeños Venezolanos that are crispy, golden, and bursting with cheesy goodness. Ready to serve them up? Let’s move on to the best ways to enjoy your homemade Tequeños!
Tips for Success
Making Tequeños Venezolanos is a rewarding experience, but a few expert tips can take your results from good to absolutely amazing. Here’s how to ensure your Tequeños are crispy, golden, and utterly delicious every time:
1. Perfect Dough Consistency
- The dough should be firm but pliable. If it’s too sticky, add a little more flour; if it’s too dry, sprinkle in a bit of cold water.
- Chill the dough before rolling it out. This makes it easier to handle and helps prevent the butter from melting too quickly.
2. Cheese Choices Matter
- Use queso blanco or queso de freír for authentic flavor and the perfect melt. If unavailable, opt for mozzarella or halloumi, which have similar textures.
- Cut the cheese into uniform sticks to ensure even cooking and easy wrapping.
3. Seal Tightly
- Make sure the dough is tightly wrapped around the cheese and the ends are well-sealed. This prevents the cheese from oozing out during frying.
4. Fry at the Right Temperature
- Maintain an oil temperature of 350°F (175°C). Too hot, and the Tequeños will burn; too cool, and they’ll absorb too much oil and become greasy.
- Use a kitchen thermometer to monitor the oil temperature closely.
5. Don’t Overcrowd the Pan
- Fry in small batches to ensure even cooking and that perfect golden color. Overcrowding can lower the oil temperature and lead to soggy results.
Find more recipes here: https://quickdishrecipes.com/malibu-bay-breeze/
Serving Suggestions
Now that your Tequeños are golden, crispy, and ready to devour, let’s talk about the best ways to serve them. These cheesy bites are incredibly versatile and pair beautifully with a variety of dips and accompaniments. Here are some ideas to make your Tequeños shine:
1. Classic Dipping Sauces
- Guasacaca: A creamy Venezuelan avocado sauce that’s tangy, fresh, and the perfect match for Tequeños.
- Marinara Sauce: A classic choice for a touch of Italian flair.
- Spicy Mayo: Mix mayo with a dash of hot sauce or sriracha for a creamy, spicy kick.
2. Presentation Ideas
- Arrange the Tequeños on a platter with small bowls of dipping sauces in the center for a party-friendly display.
- Garnish with fresh herbs like parsley or cilantro for a pop of color.
3. Pairing Suggestions
- Serve alongside other Venezuelan favorites like arepas or empanadas for a full Latin-inspired spread.
- Pair with a refreshing drink like a tropical fruit juice or a cold beer to balance the richness of the Tequeños.
Why These Tips Matter
These tips and serving ideas aren’t just about making your Tequeños Venezolanos look good—they’re about creating an unforgettable experience. Whether you’re hosting a party or enjoying a quiet night in, these golden bites are sure to impress.
Storage Tips
So, you’ve made a batch of delicious Tequeños Venezolanos, but what if you have leftovers (lucky you!) or want to prepare them ahead of time? No worries—these golden bites store beautifully when handled correctly. Here’s how to keep your Tequeños fresh, crispy, and ready to enjoy whenever the craving strikes:
1. Short-Term Storage
- Refrigeration: If you plan to enjoy your Tequeños within 1-2 days, store them in an airtight container in the refrigerator. Place a paper towel at the bottom to absorb any excess moisture and maintain their crispiness.
- Reheating: To bring back that golden crunch, reheat them in a preheated oven at 350°F (175°C) for 5-7 minutes or in an air fryer for 3-4 minutes. Avoid the microwave, as it can make them soggy.
2. Freezing for Long-Term Storage
- Before Frying: If you want to prepare Tequeños in advance, shape and wrap them as usual, then place them on a baking sheet lined with parchment paper. Freeze until solid (about 1-2 hours), then transfer to a freezer-safe bag or container. They’ll keep for up to 2 months.
- After Frying: Cooked Tequeños can also be frozen. Let them cool completely, then store them in a single layer in a freezer-safe bag with parchment paper between layers to prevent sticking.
3. Reheating Frozen Tequeños
- From Raw: No need to thaw! Fry them directly from frozen, adding an extra 1-2 minutes to the cooking time.
- From Cooked: Reheat in the oven or air fryer at 350°F (175°C) until warmed through and crispy (about 8-10 minutes in the oven or 5-6 minutes in the air fryer).
4. Pro Tips for Storage Success
- Label and Date: Always label your storage containers or bags with the date to keep track of freshness.
- Avoid Sogginess: Store Tequeños in a single layer whenever possible to maintain their texture.
- Batch Cooking: Make a large batch and freeze them for quick, delicious snacks anytime.
Why Proper Storage Matters
Storing your Tequeños correctly ensures they stay as delicious as the day you made them. Whether you’re meal prepping or saving leftovers, these tips will help you enjoy crispy, cheesy perfection whenever you want. Plus, having a stash of frozen Tequeños means you’re always ready to impress unexpected guests or satisfy a sudden craving!
Tequeños: How to Make the Perfect Golden Bites
Ingredients
Method
Notes
Tips for Success
- Chill the dough for easier handling.
- Seal the ends tightly to prevent cheese leaks.
- Fry in small batches for even cooking.
FAQs About Tequeños
Here are answers to some of the most common questions people ask about making and enjoying Tequeños:
What kind of cheese is best for Tequeños?
The traditional choice is queso blanco or queso de freír, which melts beautifully without becoming too runny. If unavailable, mozzarella or halloumi are excellent substitutes due to their melting properties and mild flavor
Can I bake Tequeños instead of frying them?
Yes! Baking is a healthier alternative. Preheat your oven to 400°F (200°C), brush the Tequeños with oil, and bake for 12-15 minutes until golden. While the texture will be slightly different, they’ll still be delicious
How do I prevent the cheese from leaking during frying?
Ensure the dough is tightly wrapped around the cheese and the ends are well-sealed. Chilling the wrapped Tequeños in the fridge for 30 minutes before frying also helps maintain their shape
Can I freeze Tequeños for later use?
Absolutely! You can freeze uncooked Tequeños for up to 3 months. Place them on a baking sheet to freeze individually, then transfer to a freezer-safe bag. Fry them directly from frozen when ready to enjoy
What dipping sauces pair well with Tequeños?
Classic options include guasacaca (Venezuelan avocado sauce), salsa rosada (pink sauce), or garlic mayo. For a sweet twist, try pairing them with guava paste or chocolate sauce